User:Divenal/sandbox
Welcome, {{#ifanon:anonymous|registered}} user.
SVG is a simple xml markup system for describing images. (Well, simple for the trivial stuff I'm using it for...) You just tell it "I want a blue circle here, a red square there, ...". Unlike a bitmap, this will render perfectly at any scale. But obviously you need software to turn it into bitmap of the size you need.
The wiki will do so itself. You can add a reference to the image from your own wiki page and tell it what size to display. Just add a reference of the form [[File:filename.svg|512px]]. The 512px is the image size you want, and you can set that to whatever you want. (I'm not quite sure if it renders it for each size, or if it renders it once on upload and just rescales the bitmap. Not sure if the wiki has an option to just pass the svg directly to the browser for rendering..?) see https://www.mediawiki.org/wiki/Special:MyLanguage/Help:Images
Modern browsers can generate svg directly. If you click on one of the images, it will take you to the wiki page about the file. Clicking again should present the svg directly to the browser for local rendering. Resizing there should be accurate since it should re-render from the vector description. You can use the browser's view-source option to see the (trivial) svg that creates the image. It should be fairly obvious how it works. The only slightly non-trivial thing is the <g ...> stuff. I tend to use that to move the origin to the centre of the canvas, and various other convenient defaults, to save having to repeat stuff on every line.
There are some online convertors you can use. Just google.
If you want to do it locally, one free application (both windows and linux) is Inkscape. You can either load the svg file interactively and then export via the menus, or use a command line:
inkscape -w 1024 -h 1024 input.svg --export-filename output.png
Another free command-line tool is ImageMagick
convert -size 1024x1024 input.svg output.png
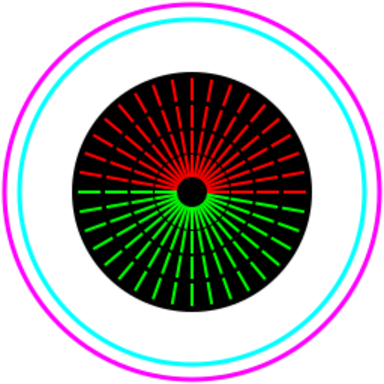
This is a tool that might be useful for distingushing https://endmyopia.org/astigmatic-cylinder-blur-vs-myopic-spherical-blur/
The gaps are intended to be calibrated to 1 minute of arc, equivalent to the gaps in landolt C test. The idea was that directional blur will close some of the gaps, but "blurry blur" will do them all. So when measuring cm's, you can distinguish the two.
Also the distance at which ghosting first appears, if you're also measuring that. For me, the ghosting appears in particular directions, so you can concentrate on the gaps on the lines where the ghost image is most-separated from the original. (ie if ghosting happens in a north-east direction, look at the gaps on the lines going north-west.)
This is a quick svg hack-up of the test page on Varakari's_Vision_Log_Tool. My intention was to be able to display it on my smartphone for measurement, but should work on any browser.
Do feel free to improve it.
This combines the two ideas... It's sized to suit my smartphone, but feel free to make your custom version as above.


